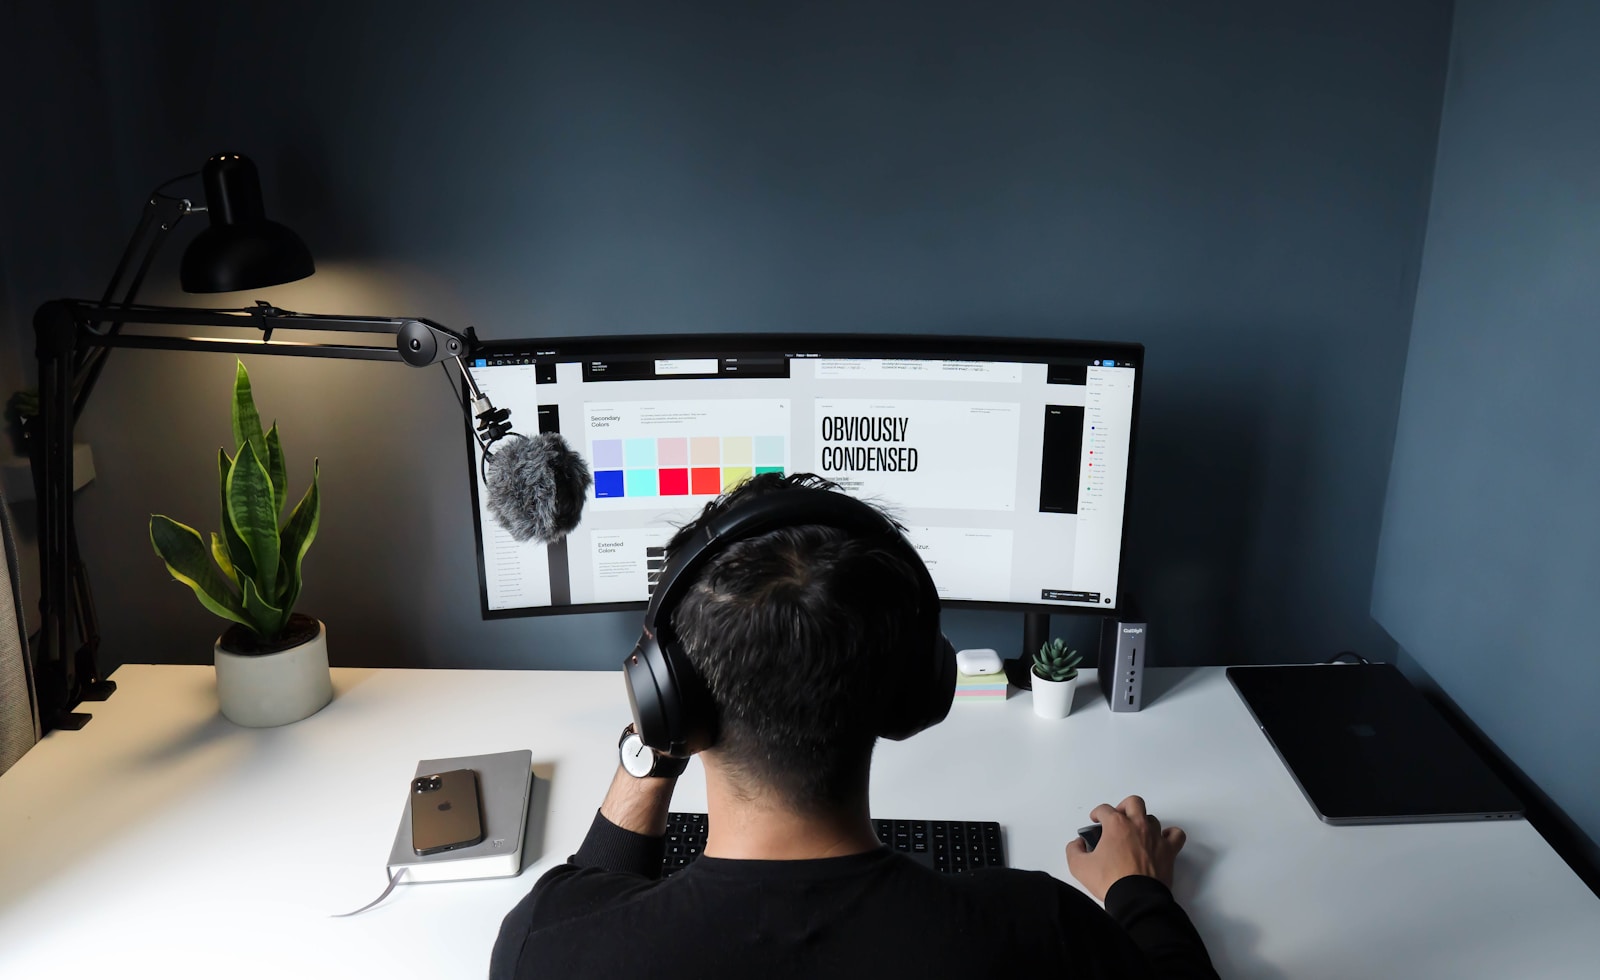
The myth that a serious home studio costs three thousand euros has done real damage to a generation of bedroom musicians. In 2026 it is possible to record, mix, and release music at professional broadcast quality on a budget of around 450 euros total, and the bottleneck in the signal chain is no longer the gear. The bottleneck is the room, and after that, the musician. This is a concrete build, with specific models at specific prices, current as of April 2026.
The budget, divided
The split that works for most first-time builders is roughly 30 percent on the audio interface, 20 percent on the microphone, 15 percent on headphones, 5 percent on cables and a stand, and the remaining 30 percent held back for either a pair of budget monitors or room treatment, whichever your space needs more. Software at this tier is nearly free; the DAWs that cost four hundred euros do not offer meaningfully different sound at the beginner stage.
| Component | Target spend | Tested pick |
|---|---|---|
| Audio interface | 135 € | Focusrite Scarlett Solo 4th gen |
| Microphone | 100 € | Lewitt LCT 240 PRO or sE Electronics X1 A |
| Headphones (closed-back) | 80 € | Audio-Technica ATH-M40x |
| Mic stand, pop filter, XLR cable | 35 € | K&M 210/9 or equivalent |
| DAW | 60 € | Reaper (discounted licence) |
| Room treatment or budget monitor (optional) | 40 € | Acoustic foam pair or single Adam T5V second-hand |
Audio interface: the gateway to everything else
The interface converts analogue sound into digital data. It is the single component that touches every signal in your studio, which means it also sets the ceiling for every other component. In the 100 to 150 euro band there are three credible choices in 2026: the Focusrite Scarlett Solo 4th generation, the MOTU M2, and the Audient EVO 4.
The Scarlett Solo is the safe recommendation because its preamps are quiet, its drivers are stable across macOS and Windows, and the converter quality — measurably 24-bit/192 kHz, audibly indistinguishable from interfaces at three times the price — is enough for commercial-release recording. The Audient EVO 4 has nicer preamps and automatic gain-setting, which is genuinely useful for beginners. The MOTU M2 has slightly better converters and a more detailed sound but is a touch fiddlier to set up.
What matters practically: two inputs (one is not enough, you will soon want to record a mic and a guitar DI at the same time), phantom power for condenser mics, a headphone output that actually drives high-impedance headphones, and USB bus power so you do not need an additional wall wart. All three of the interfaces above deliver on those points. Any of them is a ten-year purchase.
Microphone: one dynamic or one condenser, not both
The choice at this price band is between a large-diaphragm condenser (Lewitt LCT 240 PRO, sE X1 A, Audio-Technica AT2035, Rode NT1 Signature) and a dynamic (Shure SM58 for general use, SM7dB for voice-focused work if you stretch the budget). The correct answer depends on your room.
Condensers are more detailed. They capture the subtle articulation of acoustic guitar strings, the breath in a vocal line, and the brush-to-snare contact on light jazz drumming. They also capture traffic outside your window, the refrigerator compressor in your kitchen, and the ventilation system in your building. In an untreated room, a condenser can make your recordings sound worse, not better, by faithfully reproducing every environmental problem.
Dynamics are more forgiving. They have a much tighter pickup pattern, meaning sound from the sides and rear gets rejected by 20 decibels or more. This is why podcasters, streamers, and rock vocalists use the SM7B in untreated home offices and still sound professional. A dynamic will capture less of what makes a condenser special, but it will capture nothing of what makes your room bad.
The practical rule: if your recording space is a treated room or a large, carpeted, furniture-filled space that is quiet at night, use a condenser. If it is a bedroom in an apartment building at any other time, use a dynamic. The Lewitt LCT 240 PRO at 99 euros and the Shure SM58 at 115 euros are both excellent; either will outlive several generations of interfaces.
Headphones before monitors, always
Every beginner wants studio monitors. The correct starting order, though, is headphones first, room treatment second, monitors third. Closed-back studio headphones in the 70 to 120 euro band — Audio-Technica ATH-M40x, Beyerdynamic DT 240 Pro, Sony MDR-7506 — are accurate enough to mix on for your first six to twelve months of recording work.
The M40x has become the default recommendation in this price band for a reason: its response curve is unusually flat for a closed-back at 80 euros, which means mixes that sound right on them translate reasonably well to car speakers and earbuds. The MDR-7506 is legacy broadcast gear, slightly brighter, still in constant use in Italian radio production today.
Add a second pair of cheap open-back headphones, later, when you can. Cross-referencing a mix between two different headphones is the single best technique for avoiding bass and midrange errors, and it costs nothing to implement once you own both pairs.
Room treatment: the invisible upgrade
A 40-euro improvement in your room’s acoustics will improve your recordings more than a 200-euro upgrade to your interface. Home studios overlook this because the gear is more photogenic than the panels.
At the minimum budget end: two pairs of acoustic foam panels (about 25 euros total for four two-centimetre tiles), placed at the two first reflection points on the walls to the left and right of your chair when you face your computer. If you can add a heavy curtain behind the listening position and a rug on the floor, you have effectively treated a small room for about 50 euros. The flutter echo and early reflections that characterise untreated bedrooms will drop noticeably, and every condenser recording from that point will sound more professional.
The cheap acoustic foam that dominates online marketplaces does very little below 500 Hz, so do not expect it to fix the bass problem in a small square room. For that you need bass traps in the corners, which are larger and cost more, and they usually come after the first year of serious work.
DAW: stop agonising
Reaper is the answer. It is 60 euros for a non-commercial licence (90 for commercial), runs identically on Windows, macOS, and Linux, has no ongoing subscription, and reads project files from sessions started fifteen years ago. It will be reading them in another fifteen. Cockos, the developer, has maintained it with obsessive care for two decades.
If you prefer free: GarageBand on macOS is serious software that produces professional results. Cakewalk by BandLab on Windows is free and feature-complete. Ableton Live Intro, which is 99 euros, is the better choice if you work in electronic music, build around loops, or perform live with your own tracks. Logic Pro, at 230 euros, is a one-time purchase on macOS and arguably the best value in the whole DAW market, though above this build’s budget.
Avoid Pro Tools as a beginner. Its subscription pricing, outdated interface conventions, and session-management quirks are the wrong trade for most people who are not planning to work in an Italian or Los Angeles studio that requires it.
DAW comparison, side by side
Because the one-paragraph summary above does not really help someone staring at a checkout cart, here is a fuller comparison of the four DAWs most beginners in Italy actually choose between in 2026. Prices are current as of April 2026 and are quoted from the publishers’ own European storefronts.
Reaper (60 euros non-commercial, 255 euros commercial full licence). Cross-platform, tiny installer (around 14 MB), no ongoing subscription, and a fully functional 60-day evaluation that does not nag beyond a splash screen. The learning curve is moderate: Reaper’s defaults are utilitarian, not pretty, and the action-list command system feels programmer-adjacent the first week. The payoff is that almost every routing question a growing studio encounters can be solved inside one project, and SWS plus ReaPack extensions cover the gaps. An intermediate user can edit a rough podcast, track a live band, and score a short film in Reaper without ever reaching a limitation. The documentation, written by Kenny Gioia on YouTube across roughly 400 free tutorials, is the most exhaustive for any DAW at any price.
Ableton Live Intro (99 euros) and Live Standard (449 euros). Ableton’s workflow is organised around two views: Session View (a non-linear clip grid built for performance and idea capture) and Arrangement View (a conventional linear timeline). Intro caps you at 16 audio tracks, 16 MIDI tracks, and two send channels, which is enough for a bedroom producer working in electronic or hip-hop idioms but tight if you arrange full band recordings. The learning curve is shallow for the first hour and quite steep thereafter, because Live rewards specific habits around warping, quantisation, and device racks that take months to internalise. It is the obvious choice if you intend to perform your own material live with a controller; it is overkill if you only want to record an acoustic guitar.
FL Studio Fruity Edition (99 euros) and Producer Edition (199 euros). Image-Line’s lifetime-free-update policy is unique in the industry: pay once, receive every major version for as long as the company exists, which has now been 28 years. The workflow is pattern-based and step-sequencer-oriented, which suits beat-driven music natively and fights you slightly on traditional linear recording. Fruity Edition cannot record audio, which disqualifies it for anyone wanting to track vocals or instruments; Producer Edition is the realistic entry point. The learning curve is the friendliest of any DAW for someone starting from a loop-pack, sample-chopping, trap or EDM workflow, and considerably harsher for anyone raised on tape-style recording conventions.
Logic Pro (229.99 euros, macOS only). Apple’s DAW is the best-value professional tool on the market if you already own a Mac. One payment, every update free for the life of the product, a library of included instruments and loops that would cost eight hundred euros separately, and a stock plugin collection (Space Designer reverb, Vintage EQ Collection, Pedalboard) that is genuinely competitive with paid third-party alternatives. The learning curve is gentle because Logic inherits GarageBand’s interface assumptions, and the transition from GarageBand to Logic is painless. The one hard constraint is the operating system: Logic does not run on Windows, does not run on Linux, and will not run on the cheaper laptops a student budget usually lands on.
A rough decision tree that maps to the recording you actually intend to make: singer-songwriter tracking acoustic guitar and vocals on any OS, Reaper. Electronic producer on Windows building tracks from samples and soft synths, FL Studio Producer. Live performer with a controller and a taste for improvisation, Ableton Live Intro. Mac owner who wants one tool for everything, Logic Pro. Podcaster recording interviews, Reaper or GarageBand. Avoid making the choice based on which DAW your favourite producer uses; the tracks you admire were made by someone who had learned their DAW for ten years, and what you need in year one is the one you will actually finish songs in.
Acoustic treatment for bedrooms, in order of impact
Small rooms fight you. The physics of a bedroom under 20 square metres produces three acoustic problems that no amount of gear will solve: early reflections that smear the stereo image, flutter echo between parallel walls, and low-frequency standing waves (room modes) that make bass appear where there is none and disappear where there should be plenty. Treatment is the cheapest, most effective upgrade in a home studio, and it is the one beginners skip because the panels are not as fun to photograph as a new microphone.
Acoustic foam (two-centimetre tiles, 30 by 30 cm). A ten-panel pack from Auralex, EQ Acoustics, or Foamily costs between 25 and 45 euros. The absorption coefficient is meaningful from around 1 kHz upward, modest between 500 Hz and 1 kHz, and near zero below 250 Hz. In plain terms, foam tames the high-frequency brightness and flutter echo in a bedroom but does very little for the bass problem. The correct deployment is four to six panels at the first reflection points on the two side walls and the ceiling directly above the mixing position. Scattering foam randomly across all four walls is a waste of money; concentrated placement at reflection points is worth three times the sparse alternative.
Broadband absorbers (Owens Corning 703 panels, 5 to 10 cm thick). A DIY 60 by 120 cm rockwool panel wrapped in breathable fabric costs about 25 euros in materials and outperforms any foam panel at any price in the 250 Hz to 4 kHz band. Three or four panels at the first reflection points, plus one behind the listening chair, covers the midrange problems comprehensively. The assembly takes an afternoon with basic tools. This is the single highest-return modification a home studio can make, and it is the stage at which an untreated bedroom becomes a genuine recording space.
Bass traps (corner-mounted, 10 to 30 cm deep). Below 250 Hz, the only effective treatment is mass and thickness. Superchunk corner bass traps — triangular rockwool fills stacked floor to ceiling in each vertical corner — are the gold-standard DIY treatment and cost about 60 euros per corner in materials. Commercial corner bass traps from GIK Acoustics or Vicoustic run 80 to 180 euros each. Two corner traps in the front of the room (behind the monitors) produce a noticeable and immediate improvement in how bass frequencies translate; four corners fully trapped is a transformation in any room under 25 square metres. The cost is real; the result is an accurate listening environment in which mixing decisions finally correspond to what other people hear on their systems.
DIY alternatives that actually work. Heavy curtains over windows reduce reflections more than beginners expect. A thick rug on the floor between the mixing chair and the monitors addresses the floor-bounce reflection that otherwise arrives 4 to 6 milliseconds after the direct sound. Bookshelves filled with books make excellent scattering surfaces because the irregular surface diffuses rather than reflects. A sofa placed along the back wall functions as a broadband absorber and bass trap in one piece of furniture. None of these is a substitute for dedicated treatment, but a bedroom furnished with carpet, curtains, a bookshelf, and a sofa is already measurably less hostile than an empty parquet-and-plaster box.
The order that produces the most measurable improvement per euro spent: rug and curtains first (usually already present), four DIY broadband absorbers at reflection points (100 euros in materials), then two corner bass traps (120 euros), then additional broadband panels on the rear wall (100 euros). A full treatment for a 12 to 16 square metre bedroom lands around 320 euros in materials and one focused weekend of assembly.
Common mistakes that quietly wreck recordings
The gear decisions above get nearly all the attention in beginner forums. The mistakes below account for most of the reason that home recordings sound amateur even when the gear is competent.
Monitoring too loud. The Fletcher-Munson equal-loudness curves describe a real biological fact: at high volumes the human ear hears the low and high frequencies much more prominently than the midrange, while at moderate volumes (around 75 to 85 dB SPL at the listening position) the frequency response flattens out. Beginners monitor at 95 dB or above because it feels exciting, and they consequently mix with too little bass and too little top end — the mix sounds fine in the studio and dull everywhere else. A cheap SPL meter, or the Decibel X app on a smartphone, resolves this in an afternoon. Mix at 75 to 82 dB for detail work, peak checks at higher volume only briefly, and every decision will translate better to other systems.
No reference tracks. A commercially mastered song in a similar genre, loaded into the DAW project and level-matched to the working mix, is the single most useful mixing tool ever invented, and it costs nothing. Beginners do not use reference tracks because they assume their taste will guide them; in practice their taste was formed by hearing commercial mixes, and their DIY mixes fall short of that standard in ways they cannot diagnose without A-B comparison. Load two or three reference tracks into every session. When your mix sounds thinner, narrower, or harsher than the reference at the same perceived loudness, the reference is telling you where the work is.
Neglecting room positioning. The monitor placement that comes out of most bedroom setups — speakers against the front wall, desk flush against them, mixing chair against the back wall — is acoustically the worst possible configuration. Speakers against a wall produce a bass boost of 3 to 6 dB below 250 Hz that has nothing to do with the speakers themselves. Mixing with your head against the back wall places you in the room’s pressure zone, where low frequencies pile up and make every mix sound boomy. The correction: pull the monitors 60 to 90 cm from the front wall, position the mixing chair roughly 38 percent of the way into the room from the front (this avoids the worst of the standing waves), and form an equilateral triangle of about one metre per side between the two monitors and your head. Tilting the monitors so the tweeters point at ear height completes the setup. None of this costs anything; the improvement in accuracy is measurable.
Recording at too hot an input level. Modern 24-bit converters have enough dynamic range that peaks at minus 12 dBFS are plenty of signal for a clean recording, with 18 dB of headroom against clipping. Beginners push levels to minus 3 dBFS because that is what tape-era manuals said, and they clip transients on percussive material constantly without noticing. Record conservative, gain-stage during mixing, and the digital noise floor will never be a problem at this quality of interface.
Fixing in the mix. The most expensive mistake, in time, is recording sloppy takes and expecting to rescue them with plugins. Editing vocals for pitch, time, and breath noise takes hours; a retake that nails the performance takes five minutes. Allocate tracking time to getting genuinely good takes rather than good-enough takes, and the mixing stage becomes creative work rather than triage.
Cables, stands, and the miscellany
A ten-euro XLR cable from Thomann or Cordial is indistinguishable from a forty-euro cable. A K&M 210/9 boom mic stand is sturdy enough to survive a decade in a home studio and costs around 70 euros; cheaper stands fall over when you rotate the boom arm. A nylon-mesh pop filter at 15 euros reduces plosives almost as well as a metal one at 35. None of these decisions is worth agonising over.
What is worth thinking about: a shock mount for the microphone, because it isolates the mic from floor vibrations and bumps against the desk. A small monitor isolation pad, if you do buy studio monitors later, because it reduces how much low-frequency energy couples into the desk surface. Both are small additions that matter more than their price suggests.
Common Questions
Do I need studio monitors if I already have good headphones?
For your first year, no. Closed-back headphones like the ATH-M40x will carry you through recording and first-draft mixing. Monitors become necessary when you start releasing mixes to others, because headphones hide spatial and bass errors.
Is a condenser better than a dynamic for vocals?
Not in an untreated room. Dynamics like the SM58 reject room reflections that make home recordings sound amateur. In a treated space, a condenser will capture more detail and breath.
Which DAW should a beginner learn?
Reaper is the most flexible paid choice at 60 euros. GarageBand is free on macOS. Ableton Live Intro is the best option for electronic music and loop-based workflows.
Can I record electric guitar directly into the interface?
Yes. The Scarlett Solo, EVO 4, and MOTU M2 all have an instrument-level DI input. Combine it with an amp simulator like Neural DSP Archetype or the free Amplitube 5 Custom Shop for a credible guitar tone.
What if my laptop only has USB-C?
All three interface recommendations come with both USB-C and USB-A cables in the box in their current revisions. Verify the packaging before ordering.
A working configuration to buy this week
For readers who want to stop deliberating and start recording, here is a specific configuration to purchase this week. Focusrite Scarlett Solo 4th gen (135 euros) + Lewitt LCT 240 PRO condenser (99 euros) + Audio-Technica ATH-M40x (80 euros) + K&M 210/9 mic stand with boom (70 euros) + pop filter and XLR cable (20 euros) + Reaper licence (60 euros) = 464 euros total. Everything ships within three days in Italy from Thomann, Strumenti Musicali, or Amazon Italy.
If the budget is stricter: swap the LCT 240 for an sE X1 A (70 euros), the M40x for the Samson SR850 (40 euros), and you land around 395 euros total. The sound quality is not meaningfully worse for first-year recording.
Whatever you buy, record something the first evening. The worst studios are the ones waiting for the perfect gear to arrive before the first track gets tracked. If you are writing the material you will record, a parallel pass at composition — see our songwriting guide for beginners — pairs usefully with the technical setup. For the mix that follows, the mixing audio guide covers the post-tracking craft that separates good recordings from releasable ones.
To recap the argument: interface first, microphone matched to your room, headphones before monitors, treatment before upgrades, Reaper before indecision. Five decisions, under five hundred euros, enough to make the music you hear in your head.
Sources
- Sound on Sound review of Scarlett Solo 4th gen
- MusicRadar coverage of home studio gear
- The Verge reporting on creator economy music tools
Sull'Autore